Copper Harbor Lighthouse

Copper Harbor Lighthouse
Showing posts with label Decor. Show all posts

Friday, December 1, 2017

One Down


Three more to go! 
(I may be slightly obsessed with Christmas decorating.)

All is well in the Keweenaw.

Thursday, November 30, 2017

The Fun Begins!

I love, love decorating for Christmas, but I'm not a gal who decorates the tree before Thanksgiving and takes it down the day after Christmas. I decorate after Thanksgiving and leave my Christmas decor up a week or two into January. In years past, I would try to do all my decorating within a day or so. That's a bit too tough on my back these days, so it may take me a week or more to finish. The fun is beginning, however!

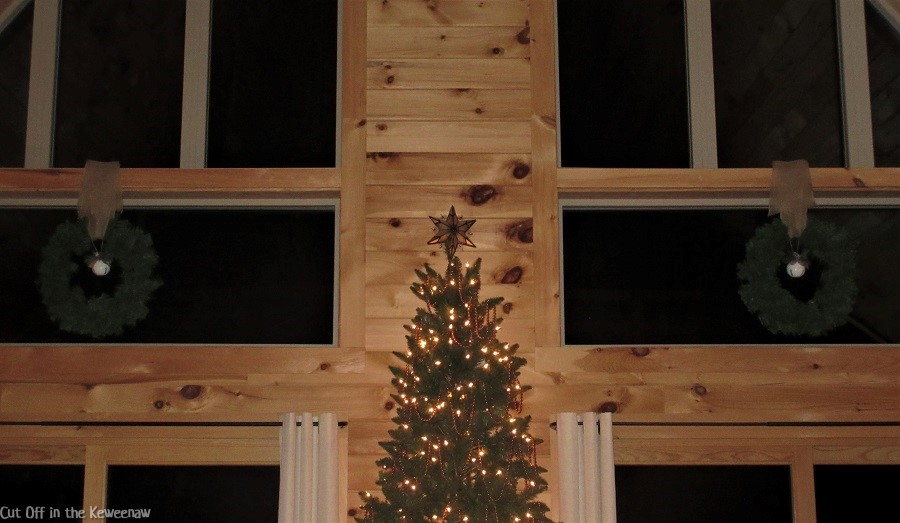
I always do the big tree (aka The Keweenaw Tree) in the great room first.

Mr. Cut Off carried it up from the basement, and I fluffed.

He had the honor of placing the star on top, and I added the 8 strings of copper beads.

None of the ornaments are on the tree yet, but I had to step back and snap some photos. Can you find the deer outside photobombing my shot?

Hint: You can see the doe through the sliding door on the left near the reflection of the lamp. Click on the photo to see it larger.

Mr. Cut Off was also helpful in tacking up the 2 window wreaths above the sliding doors for me. 

Ornaments tomorrow!

All is well in the Keweenaw.

Saturday, October 7, 2017

Still Rationing

Borrowing some free Internet today. Still rationing until Wednesday!

In the meantime, here's the fall décor in the crates.

All is well in the Keweenaw.

Wednesday, June 14, 2017

Patriotic Peek

It's Flag Day! Hope you're flying your flag!

In honor of the spirit of patriotism I'm feeling today, I thought it would be a good day to show you a peek at some of my summer patriotic decor. First up, I restyled the crates on the wall in our dining area.

That's a placemat from Dollar Tree serving as the background in the lower crate - just taped in place. I pulled an old plate out of the china cabinet for the background in the top crate, and I used my Patriotic Checkered Birdhouse here this year.

The candle is just one of those emergency candles from Dollar Tree with red, silver & blue Dollar Tree necklaces (3/$1) wrapped around it.

I have a fluffy yarn wreath on the wall in the laundry room. I removed the spring butterflies I had on it and hung a USA sign over it for a quick update. Can't get much simpler than that!

See you with part 2 of the tour of Abraham Lincoln's home soon!

All is well in the Keweenaw.

Saturday, March 25, 2017

Crate It!

I found an old pear crate in Mr. Cut Off's barn years ago and used it on top of our refrigerator when we lived in lower Michigan. One side still had the old paper label; the other side had a painted logo.

I always knew I wanted to use it in this house, and I finally made up my mind as to where I wanted to put it. It landed on a wall in the dining area.

After we had it on the wall, Mr. Cut Off said he knew he had another crate around here somewhere. Did I want it? Duh,yeah. It took a little hunting, but he eventually found this Remington box in the barn.

After a thorough cleaning, it landed on top of the pear crate.

Since our walls are pine and will not be painted on a whim every few years, I was thrilled to have another surface (or two - or three) to decorate - something that CAN be changed seasonally or on a whim.

Along with a vintage toaster, 

we've got a little Easter/spring thing going on right now.

There's my Vase Makeover project. . .


An old scale graces the top surface. . .

and these 2 blue pieces I inherited from my grandmother sit in the middle.


You'll get more peeks at these crates as things change throughout the year(s).

All is well in the Keweenaw.

Tuesday, November 22, 2016

Quick Bowl & Vase Fillers

Had some leftover yarn.

Had an empty bowl.

Filled it up FAST & FREE. (Same way I made my SNOWBALLS. You can see them HERE.)

You won't need as much yarn if you start with a ball formed from a plastic grocery bag. We all have lots of those, right?

Just start wrapping. . .

and continue wrapping. . .

until the grocery bag is covered. Cut your yarn and tuck the loose end under some of the wrapped yarn.

I started with a grocery bag wadded into a smaller ball for the second one to vary the size a bit. I also untwisted the yarn slightly on the second ball to give it a different look.

The variegated yarn was used on 4 other bag balls of various sizes - giving each a unique look. 

The 7th ball was created with the last bits of both skeins twisted together. That's the one on top.

Bowl filled. Mission accomplished.

I'm off to bake a triple batch of buttermilk rolls now - some for Thanksgiving - some for the freezer!

All is well in the Keweenaw.

Friday, November 18, 2016

Barn Wood & Faucets

Just a quick post today to share the latest addition to the laundry room.

Our garage entrance opens into our laundry room, and that's the way we usually enter our home. We rarely use our front door. Our original plans were to build a coat closet and a pantry into the laundry room. They were going to be roughly the same size - one on each side of the window. The closet made the list of things to do before we moved in, but the pantry did not. After living here for a year, we realized that we didn't really need that closet for coats, as we had other closets we were using for those. That led us to the decision to add some temporary shelves to the closet and see how it functioned as a pantry/broom closet. Much better. 

But. . .

that left us with no nearby spot to hang jackets worn by our guests. 

And. . .

I had another problem. I'm NOT a "throw the clothes into a laundry basket hot out of the dryer and let them cool and get wrinkled" kind of girl. Nope. Not me. I'm definitely a "hang them up before they get wrinkled" and a "fold them as you take them out of the dryer" girl. Thus, it's normal for me to put clothes on hangers as I take them out of the dryer, but I had no place in the laundry room to temporarily hang those hangers. Needless to say, I was making a lot of extra trips back and forth to the master closet. The exercise was fine, but I was wearing out my slippers! I needed hooks.

When I spotted some hooks I liked on Bits of Vintage, I knew I had my solution for both problems. 

Don't you think faucet hooks are sort of appropriate for a laundry room?

Per my request, my precious hubby mounted them on a piece of barn wood for me.

No, that silver tote bag isn't normally hanging there - just put it there for demonstration purposes. Trust me. The hooks do work for their intended purpose of coats and hangers!

All is well in the Keweenaw.

Monday, September 12, 2016

I Finally Caved

OK, I finally caved - gave up - surrendered - threw in the towel - sent up the white flag. I guess once you've put 12 screw holes in your bedroom window trim, you might as well put 8 more in the window trim in the dining area. Yep, we purchased more drapery panels.

Because we normally have dinner at 6:00 p.m., the sun often shines directly in my eyes when we're eating in the summer months - blinding me so badly some days that it's difficult to see what's on the table in front of me. Yes, I could move to the opposite side of the table, but having the sun burn a hole in the back of my head is almost as annoying. Plus, that doesn't solve the problem when we have company. I suppose we could adjust our dinner time at that time of year so as not to correspond to the eyeball-searing rays of the sun, but we're both way too routine oriented to be happy with that solution.

If you remember, I was resisting the whole window covering thang for our first year in the new house. We have no human neighbors or traffic we need to shield ourselves from, so we can walk around in our PJ's day or night without fear of being seen by anyone. I eventually decided the best solution in the dining area would be to hang one of those temporary paper adhesive accordion shades in that window - again, just during the summer. I would take it down at the end of the summer, clean up any leftover sticky residue with Goo Gone and enjoy my bare windows all fall, winter and spring. I convinced myself I could live with that. Turns out - no matter how hard I tried - I'm just not a paper shade kind of girl. I could kind of ignore the fact that the shade was paper. . . but, those double-ugly plastic clips used to hold the shade in the UP position did not agree with me at all. Maybe if we were talking about the window on a seldom used enclosed porch - but not on the window right smack dab in front of our dining table. I briefly (like 10 seconds) entertained the notion of gluing something "cutsie" to the clips - perhaps a stone, flower or butterfly - but that would have drawn even more attention to the paper shade. Uh, uh. Not gonna work. 

I started weighing my design options. What could I buy that would resolve our problem attractively and be most agreeable to my frugal nature. OK, it had to be floor-length drapery panels with grommets, and the color had to be light - preferably just off white - some texture - no flowers or graphic design. They had to be sun-blocking, but not blackout panels like I needed in the bedroom for my migraines. We made a trip to Menards in Marquette on Labor Day for some lumber Mr. Cut Off needed, and I spotted my solution. Yes, another screamin' deal! How does 4 window panels meeting everything on my wish list at $6.99 each grab ya?

That comes to $27.96 for 2 windows. Yes, please! (You've heard the song. Help me sing it now. "Save big money - save big money - when you shop Menards!")

I was also able to get the same bronze curtain rods I used in the bedroom while we were there. They're so simple (not fussy) that you almost don't notice them. They're also very sturdy - no center support is needed - so they won't interfere with my Christmas window wreaths. Yeah, I thought ahead. Mr. Cut Off was amused.

I was amused because one of the options I had been considering to get the look I wanted was to purchase cotton drop cloths (like a painter would use), hem them to the desired length and hang them from rods using drapery clips. (Stop laughing now and do a Google search; you'll find plenty of examples on the Internet.) These drapery panels from Menards came in under budget - without dragging out my sewing machine - without purchasing drapery clips - and I get a very similar look. I know! Fist Bump!

Now that the drapery panels are hanging in the dining area, we're really loving 'em. They give our windows a little more personality. Grommets allow curtains to take up very little space when they're pushed all the way open, so the panels aren't blocking our view, they're framing it.

I don't know why we were so resistant to putting screw holes in our window trim (and, no, hanging them higher and drilling holes in the pine walls was not an option for us). Maybe it's because we do have such a personal relationship with the wood. This pine window trim and all the tongue & groove boards covering our walls and ceilings came from our own trees - trees that had to come down anyway to clear the path for our driveway and home site. It was milled, stacked, restacked, dried for years and cut to the proper dimensions before going up on the inside of our home. Mr. Cut Off's hands have been on every single board many, many times. It's very special to us. In the long run, we've decided that we're not really destroying or covering up our wood by hanging a few curtains. We're just enhancing it. Don't be surprised if we enhance it a little more the next time we go to Marquette. The patio doors are feeling a bit neglected. (Update: We did end up using the same panels at the patio doors in the great room.)

All is well in the Keweenaw.